Showing posts with label beginners guide. Show all posts

Wednesday, 18 January 2012

{Beginners Guide) to Vintage Gloves


Rules of Glove Wearing


There are many rules to be observed in the art of Glove Wearing, here are  the main ones:-

* Gloves should be worn when shopping, dancing, visiting and outdoors as well as to a place of worship.    (Basically whenever they would look pretty!)
* Gloves should  not be worn whilst eating, drinking, applying make-up or smoking.
(This is common sense , don't wear gloves when they may get dirty!)
* If gloves get soiled, remove and do not wear until washed.
* Remove your right glove  before shaking hands. If not possible then you should apologise by saying 'pardon my glove'.
* When gloves are removed they should be placed directly in your bag and not carried.
* Remove rings before putting on gloves


I hope they're going straight into your handbag Audrey dear!


Marlene Dietrich 


Types of gloves...

There are many types of gloves and several lengths availablefor you to choose. A general rule of thumb is that  
            "the shorter the sleeve the longer the glove"


Opera Gloves


Three-Quarter (or Coat)  Length Gloves


These are approximately 14" or six-button in length. These may be worn with any length sleeve, tucking under longer sleeves.


Gauntlet Gloves


Suitable for most sleeve lengths, the armpieces are worn over the sleeves.


 Day Gloves


Short gloves finishing at the wrist. Made from cotton or later nylon, also popular were crocheted gloves.
 

During the 1950s gloves were the finishing touch to any ladies outfit, giving a polished, groomed look. Although cream or white were most popular choice, gloves were now available in a whole range of colours


Choose colours that match compliment or contrast your outfit see my colour post for help


How to find your Glove Size
  • Measure all around your hand with a tape measure. Place tape around the knuckles of your hand (indicated by the red line in the photo below). 

  • Measure your dominant hand - the right if you are right-handed, and the left if you are left-handed.
  • Compare this measurement on the chart below to find your correct glove size!
Note: some manufacturers indicate glove sizes by inches and others by Small, Medium, Large, etc. . Use the tables below to find your size.


Named Size Inches Cm
x-small 6 15
small 17
medium 7 18
large 19
x-large 8 20


If you manage to get yourself a pair of vintage gloves that need a little freshening up,  you can find a guide on how to wash them here

Thursday, 12 January 2012

{Beginners Guide & Tutorial} Half Moon Manicures

Dita von Teese and her Half Moon Manicure

A very vintage way of manicuring your nails, the half moon manicure where to the nail is painted but the half moon (and or tip) area is left bare, Popular in the 1920s, 30s and 40s the half moon manicure  is also making a resurgence these days among many vintage loving gals.

Now I know your thinking whats the point, your busy right? Can hardly get together a normal lick of polish let alone spend ages doing a tricky half moon manicure!! Well relax, this really is easy......

and will look fantastic!


Half Moon Manicure Tutorial


You will need
Base & Top coat
Nail polish
Hole re-enforcing stickers


How to do it...

1.First cut / file your nails into you preferred shape - I like to keep mine  fairly short but rounded.

2.Remove any old polish


3.Apply a base coat of polish, I use clear polish , but you can certainely mix it up and go for another coloured polish! Let it dry.

4. Apply re-enforcer stickers to the base of the nails to create a mask for the half moon shape - make sure they are central on each nail!


5. paint your nails with main colour varnish, painting slightly over each sticker. Let dry.

I've used 'Rapid Ruby' for this tutorial.


6. Carefully remove stickers, if your careful use can place them on other hands nails!!!


7. If required, apply a top coat all over the nails.


Go out, be beautiful!!!


Where things may have gone wrong.....

Placement of stickers - be brave you need to cover quite a deep bit of your nail to get this looking right. The top of the hole should be in line with the base of your nail, no less.

Varnish coming off with the sticker - two culprits here, you may have put on too much varnish or may not have let the varnish dry thoroughly. If its taking off  the base coat, then stick the re-enforcer to something else first before applying to your nail and the stickiness will hopefully be reduced.

Varnish creeping under sticker - make sure the sticker is firmly stuck down with no gaps. paint nails from base to tip direction


Hope you like it!


Friday, 6 January 2012

{Beginners Guide} Vintage Colour


 Image via DressingVintage

... or breaking away from neutrals.

Remember when you were a child and wore clothes because you liked them, not because they went together or coordinated? You wore things that made you feel happy, and somehow, sometimes, you just looked amazing

My daughter is great at this, at only 9 she can pull random colours from her wardrobe and have a fantastic outfit in 2 minutes, smiles beaming all over her face!! Somewhere between childhood and grown up we can loose the joy of wearing colours and find ourselves sticking to safe neutrals!

My mother would take great pleasure in telling you that when I was 16 most of my wardrobe consisted of  black, by the time I left home and started work in an office, I had matured to a mostly navy wardrobe!! Now I am guilty of being drawn to buying grey , grey or grey grrr!!

The world of Vintage can be a wonderful journey into colour!!!

|Browsing the photos of vintage clothing on Etsy can be like dipping into a big bowl of sweets, so many lovely colours! Who wouldn't want to wear all that happiness!

Ok, we're entering a slightly scary area for some of you, so once again I'm here to hold your hand....

Start Small

There are some colors that scream vintage to even mainsteam  viewers, by mixing these with your neutral wardrobe as an accent colour, it can ease you in gently. Try mustard, cherry red or jade


Take inspiration from homes

Every decade has its palette of colour, peruse the palettes and take inspiration for your wardrobe


Go to the site and slide along to timeline for your desired decade!!!

Go with the seasons

Its a lot easier to feel relaxed in colour if you are in harmony with your surroundings. Remember being drawn to wearing red at Christmas? You looked fab and didn't feel too self concious did you? Try pastels in spring, Candy brights  in Summer, or Russets in Autumn

dethrose's sand and sea look


Use a Colour Wheel

beadworks.co.uk

Want to know what colour accessories to wear with your new dress? Use a colourwheel.

An easy guide to using a colourway
1. Choose the colour you want to wear
2. Decide if you want toning, harmonising or contrasting colours.
- For Toning colours choose from within that slice of the wheel (lighter or darker tones of that 1st colour)
- For complimentary colours choose from the slices either side of your original colour.
- For contrasting colours chose from the slice directly opposite your original colour.
3. Don't be afraid to mix all three across your clothes and accessories,eg. lighter and darker shades of green for an outfit with red accent accessories.


Take Inspiration from Something you love

Do you have a favourite painting or vintage china pattern? Pull your outfit colour from that. Choose the most dominant colour, or your favourite as your main item of clothing, dress, suits etc, the next as your accessories hat, gloves, shoes etc, then the third most dominant as your highlight bracelets, earrings, shoe clips, brooch etc

You can make it easy to find the pallete of a picture by entering it into this online palette generator from degraeve.com


So basically, be brave and give it a try, even if its only a little colour, and cheer up this yucky winter weather!!
If you already have this sussed and have some great colour combos to inspire us, please share them in the comments below!


Thursday, 1 December 2011

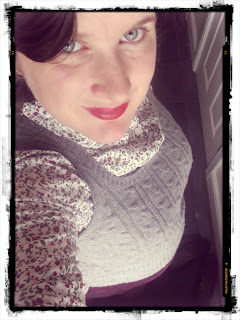
{Beginners Guide} Why everyone should own a red lipstick and 5 easy steps to wearing it!


Red Lipstick and the Vintage Look seems to go hand in hand doesn't it???

Before I got into vintage, I hardly wore make up. So confronted with the notion that a vintage look had to involve a bright red lipstick, I was rather scared!!

If you've not taken that step into red lipstick yet then I know exactly how you feel and I'm here to hold your hand!! Here are five easy steps to becoming a red lipped vintage lovely!!

Step One

Find out what shade suits you. Every skin shade suits a different shade of red lipstick. What? different reds? Why yes! All red lipsticks have different undertones, blue, orange etc
Choosing the correct one can even mean whiter teeth and a brighter skin tones!

Black or Brown haired girlies with a warm complexion should choose shades of red with brown undertones, golden, deep, and coral colours.
Dark hair but cool complexion, choose shades of red that are plum, burgundy or cherry red
Blonde Bombshells with warm complexions should buy reds that are coral, orange or copper undertones.
Cool Complexion blondes need to look for blue undertones  or plum.
Redheads with warm complexions should buy brighter and orangey shades of red
Cool complexion redheads can buy bluebased reds, plums and berry tones

 {Extra Tips}

*An Orange/ Coral based lipstick will have brown undertones , a blue based one will have blue!
*A great place to test a lipstick to see if it suits your undertones is on the inside of your wrist (wear the sun hasn't caught you as much!
* Blue based lippy is perfect for paler skins and will make your teetch seem whiter
*Orange based lippy works will with olive skin tones

Step Two

Ease your way into it. Once you've got the right shade you don't have to go full out with the lipstick. A great trick is to apply a lipbalm to your lips then apply your lipstick over the top using your finger! This will create a more subtle lipstain effect. Start wearing your red lipstick this way as much as you can without feeling uncomfortable

Step Three

Time to step up to the full red lipstick look. First of all practice applying your lipstick at home - don't wait for the evening of your do!!!
Do you need a lip primer or pencil? Worrying if your lipstick is bleeding or feathering isn't going to help put you at ease is it?

How to apply your lipstick....

1. Apply any primer as directed on the package.

2. Outline your lips with a lip pencil, draw around your natural lip line or recreate the fullness of lips you want with the line drawn. (This is a great time to even out wonky or uneven lips)

3. Fill in with lipstick using a lipbrush. Load up your brush and paint your lips!

4.When you've covered them , blot with a tissue, then reapply a second coat if needed.

Now look in the mirror...... don't you look gorgeous?

Step Four

No? You looked in the mirror and you're still not sure? Ok - no need to go out just yet, keep practising putting it on and wearing around the house, the more you do this the less nervous you'll feel when you finally want to go out in it!
And yes, when the postman rings, you may want to scrub it off before you answer the door but seriously answer it!! Its  only going to be 30 seconds and you'll be looking down at the signing sheet for most of it!

Still not quite there? try going out alot more using the lipstain idea and gradually build up the amount of lipstick you add.

Step 5

You're finally feeling ok-ish about the idea of wearing it outside - yay!! Now pick your battles, I wouldn't suggest wearing it on the school run, or particularly anywhere you will bump into someone you know sans make up. Go out somewhere, anywhere! A walk in the country, shopping, sightseeing and enjoy your day! Then gradually ease in days where you'll know people, and then a 'look at me' outing. Soon you'll forget ever being nervous and wearing red lippy will be the norm!!

Rockalily Roulette Red

A little bit more, just so you know....

* the first time I wore red lippy to school was about 4 months into wearing  it out, and it was only a quick dash in to pick my daughter up for a dentist! I forgot I was wearing any till we got out!
* I now feel somethings missing if I haven't got red lips!
* I just bought my third red lipstick, and have already picked out my 4th!


And the Why....

Well, why not?
Red Lipstick is fabulous, its the cherry on the cake! 
No time before you go out? A slick of red lippy and you're ready to go!
It will brighten up your whole outfit.
Unlike your most expensive jewellery or  most exquisite dress, you can wear it everyday and feel a million dollars!!
Its a real confidence booster!


Related Posts Plugin for WordPress, Blogger...